How to grow watercress at home, from seed or cuttings

Written by Jon Persson, partner and designer at Herbs at Home
Published · Updated · 8 min read
Some links below go to Amazon. If you buy through one, we earn a small commission at no extra cost to you.

Watercress in short
A water-loving perennial with a peppery bite, and one of the few herbs that genuinely wants to sit in water. Refresh the water regularly to avoid algae.
- Light
- Full sunSunniest window, or 14 hours under a grow light
- Water
- Standing waterConstant. Grow in standing water, refreshed regularly
- Temperature
- 50–70°F
- Difficulty
- Beginner
What usually goes wrong
Water turns cloudy and starts to smell, stems go slimy at the base
Fix: Change the water every day or two, twice a day in a warm room. Keep the tray shallow and in the coolest bright spot available, and pull out any soft stems before they take the rest with them.
Here is how to grow watercress indoors: keep the roots wet all the time, and never let the water go stale. Stand the pot in a tray of water, and change that water at least twice a week. Give it your sunniest window, or about 14 hours a day under a grow light. Start from seed, or root a few supermarket stems in a glass of water in about a week.
Watercress breaks the usual rules for growing herbs indoors. Most herbs die from too much water. Watercress wants wet feet, and what kills it is water left to go stale. For a quick profile of the plant, see watercress at a glance.
Watercress growing conditions at a glance
These are the numbers to aim for.
| Need | What watercress wants |
|---|---|
| Water at the roots | Always wet. The pot stands in 1 to 2 inches of water. |
| Fresh water | Change it at least twice a week, and every day or two in a warm room |
| Light | Your sunniest window, or 14 hours under a grow light |
| Room | 60 to 70°F is best. It still grows below 60°F, only slower. |
| Tray water | Keep it cooler than about 78°F |
| Soil | Bagged potting mix, never garden soil |
| Seed to sprout | About 1 week (3 to 14 days) |
| Stem to roots | About 1 week |
| Seed to first cut | 4 to 6 weeks |
| Regrowth after a cut | 3 to 4 weeks |
How to grow watercress in a pot, no running water needed
You do not need a stream or a pump. Stand a pot of wet potting mix in a tray of water, and swap the water often. Utah State University suggests the same thing: a pot in a bucket with 2 to 3 inches of water.[1]
The swap matters. Still water goes stale, starts to smell, and rots the stems at the base.
- Pick a pot about 6 to 8 inches wide with holes in the bottom. Plastic is fine. Our guide on how to pick a pot for herbs covers sizes.
- Fill it with bagged potting mix, and soak it until water runs out the bottom. Most bags are peat with perlite or vermiculite, which suits watercress fine.
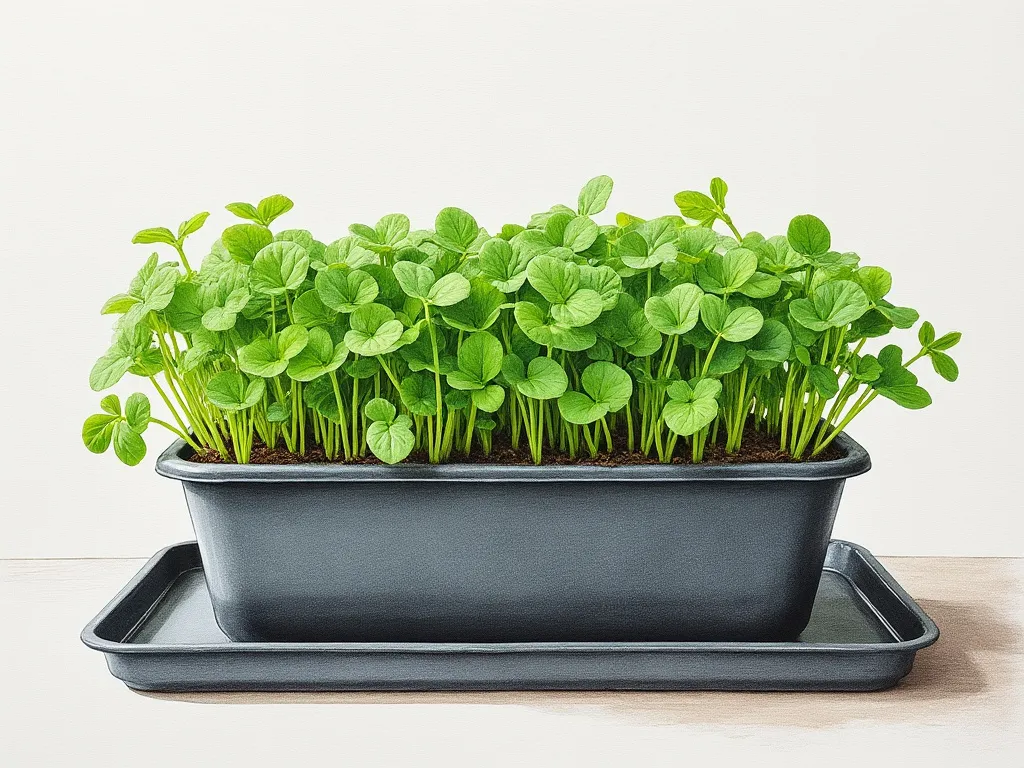
- Stand the pot in a tray or bowl with no holes. Keep 1 to 2 inches of water in the tray, so the bottom of the mix sits in water.
- Change the tray water at least twice a week. In a warm room, or if it smells, change it every day or two. Rinse the tray each time.
- Use a dark tray, not a clear one. Light on still water grows green algae.
A deep tray with no holes makes a good water tray for one or two pots.

Bootstrap Farmer 1020 trays, 2.5 in deep, no drainage holes
- 2.5 inches deep, so a taproot has somewhere to go
- Solid base with no drainage holes, so the tray doubles as a water reservoir
- Food-safe BPA-free polypropylene, made to be reused rather than replaced

The enthusiast’s guide to herbs
In-depth care cards for the 35 herbs people most often grow indoors.
See what’s insideHow to grow watercress from seed
Sprinkle the seed on top of wet mix, keep it wet, and look for sprouts in about a week. Sow it straight into the pot it will live in, so you never have to move the seedlings.
Buy seed labeled Nasturtium officinale. Garden cress and upland cress are different plants with similar names.

Seed Needs’ watercress seeds (1,000 seeds)
- Non-GMO
- Heirloom
- Two packs of 500 seeds each
- Set up the pot and tray as above, with the mix soaked.
- Sprinkle a pinch of seed thinly over the top, and press it down with your palm. Do not cover it. The seeds are tiny, and they sprout on the surface.[2]
- Keep the top wet until sprouts show. The tray does most of the work, but mist the surface on a warm, dry day.
- A cool room is fine. The seed sprouts anywhere from 41 to 77°F.
- Leave the seedlings as a clump. You cut watercress like a small lawn, so there is no need to thin it.
Your first cut comes 4 to 6 weeks after you sow.[2] If you want a faster crop, you can also grow it as microgreens and cut it young.
How to grow watercress from supermarket stems
A bunch of fresh watercress from the store will root in a glass of water in about a week. It is the fastest way to start.
- Pick the freshest bunch you can find. One sold with its roots still on is even better.
- Cut stems about 4 inches long, and pull off the lower leaves.
- Stand them in a glass of water on a bright windowsill. Change the water every day or two.
- When the roots are about 1 inch long, plant 3 to 5 stems in a pot of wet mix. Push them in up to the first leaves, then stand the pot in its tray.
Rooted stems already have leaves, so you can start picking sooner than from seed.
Can watercress grow in just water?
Yes, for a while. Stems keep growing in a glass of water, but tap water holds almost no plant food. After a few weeks, the leaves turn pale and small.
There are two fixes. Move the rooted stems into potting mix, as above, or add a weak plant food made for growing in water. Researchers in Hawaii have grown whole crops of watercress this way, in tanks with no pump at all. Our lettuce guide explains the no-pump jar method, and watercress grows the same way.
Keep the water cool and dark. Water warmer than about 78°F slows growth. A clear jar in the sun grows algae, so wrap it or use one you cannot see through.
How much light does watercress need indoors?
Watercress needs more light than most people think. Give it your sunniest window,[1] ideally one that faces south. Or give it about 14 hours a day under a grow light, 6 to 12 inches above the leaves.[3]
It does poorly in deep shade.[4] In a dim spot, it grows long, thin, and pale.
Keep a grow light to about 14 hours, not 16 or more. Watercress starts to flower as the days get longer,[4] and once it flowers, the flavor fades.[1]
Hot sun through glass can warm a small tray of water. If the tray feels warm, pull the pot back from the glass at midday, or use an east window in summer. Turn the pot every few days so it grows evenly. For lamps and timers, see our guide to grow lights for herbs.
Keep it cool
Watercress grows best at 60 to 70°F. It still grows below 60°F, only more slowly. Above 85°F the taste goes downhill, so keep it away from heaters, vents, and the top of the fridge.
How to harvest watercress so it keeps coming back
Cut the stems back to about 4 inches tall with scissors.[1] New shoots grow from the leaf joints, and you can cut again in 3 to 4 weeks.[2] Never cut lower than about 1½ inches, or it has little left to grow back from.
You can also pick single leaves at any time. Pinch off flower stalks as soon as you see them.
Watercress is a perennial, a plant that lives for years, and one pot gives you months of picking. When it turns woody or keeps trying to flower, start a fresh pot from a few of its own stems.
It needs little food. Add a weak liquid plant food to the tray water every few weeks. Our watercress care guide covers feeding and keeping a pot going. For the harvest itself, here are ways to use watercress in the kitchen.
Is homegrown watercress safe to eat raw?
Yes. Watercress you grow in tap water is the safe kind to eat raw. The CDC says raw wild watercress can carry liver fluke, a parasite from places where farm animals graze.[5] Rinse your harvest as you would any greens.
Why is my watercress leggy or yellow? Common problems
Most problems come down to light, stale water, or heat.
| Symptom | Likely cause | Fix |
|---|---|---|
| Long, thin, pale stems leaning to the window | Too little light | More light. Cut the long stems back so it regrows bushy. |
| Leaves turning yellow or small | Out of plant food | Weak liquid plant food, or move stems from water into potting mix. |
| Cloudy or smelly water, slimy stems at the base | Stale water | Fresh water, a rinsed tray, and soft stems pulled out. Change it more often. |
| Green film on the water or tray | Algae, from light on still water | Dark tray or jar. Rinse it at each change. |
| Flower stalks, harsh or bitter leaves | Long days or heat | Pinch off flowers, move it somewhere cooler, and keep lights to 14 hours. More on why herbs bolt. |
| Tiny green bugs on the tips, sticky leaves | Aphids | Rinse them off under the tap, and use insecticidal soap if they come back. More on getting rid of aphids and other indoor pests. |
| Tiny white flies, or fine specks on the leaves | Whiteflies or spider mites | Insecticidal soap, sprayed under the leaves too. |
Questions & answers
How long does watercress take to grow?
Seeds sprout in about a week, and your first cut comes 4 to 6 weeks after you sow. Supermarket stems root in about a week, and you can pick them sooner. After each cut, it grows back in 3 to 4 weeks.
Does watercress come back every year?
Yes. It lives for years and grows back after each cut, with 3 to 4 weeks between cuts. Indoors, start a fresh pot from your own stems when the old one gets woody.
Can you grow watercress indoors?
Yes. It needs a sunny window or a grow light. Stand the pot in water, and change it twice a week. Winter is a good time to grow it, because it likes a cool room.
Is watercress easy to grow?
Yes, once the pot is set up. You cannot give it too much water. The two things that go wrong are stale water and too little light.
Where does watercress grow?
In the wild, it grows at the edges of slow streams, rivers, springs, and ditches. At home, it grows in any pot that stands in a tray of water.

Ten printable herb cards, free
One card per herb: how much light and water it wants, and what goes wrong first.
Get them nowReferences
-
Utah State University Extension, How to grow watercress in your garden. https://extension.usu.edu/yardandgarden/research/watercress-in-the-garden ↩︎ ↩︎ ↩︎ ↩︎
-
University of Hawai’i CTAHR, Growing watercress from seed by a non-circulating hydroponic method. https://www.ctahr.hawaii.edu/hawaii/downloads/Growing_Watercress_by_a_Non-circulating_Hydroponic_Method.pdf ↩︎ ↩︎ ↩︎
-
University of Illinois Extension, Grow herbs and lettuce indoors this winter. https://extension.illinois.edu/blogs/good-growing/2017-11-17-grow-herbs-and-lettuce-indoors-winter ↩︎
-
U.S. Fish and Wildlife Service, Watercress (Nasturtium officinale) ecological risk screening summary. https://www.fws.gov/sites/default/files/documents/Ecological-Risk-Screening-Summary-Watercress.pdf ↩︎ ↩︎
-
Centers for Disease Control and Prevention, About Fasciola. https://www.cdc.gov/liver-flukes/fasciola/index.html ↩︎


