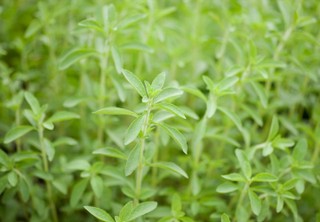
How to grow stevia indoors

Stevia (Stevia rebaudiana) has made itself well known to consumers as a natural alternative to sugar. As people try to reduce their overall consumption of sugar and artificial sweeteners, stevia is taking a leading role as a healthy, low-calorie natural sweetener for beverages and recipes.
For those wanting to manage their health even more carefully, they’re opting to grow their own stevia plants, giving themselves access to a locally-sourced, minimally processed sweetener.
Stevia is a tender perennial herb, so it cannot grow outdoors in climates that experience frost or snow in the winter. In order to have a year-round supply, many people choose to grow stevia indoors. Plants are best propagated via stem cuttings or air-layering, although they can be grown from seed. They prefer at least 8 hours of sunlight daily, temperatures above 70℉, and benefit from regular harvesting.

Supplies needed for growing Stevia indoors
With only a few basic supplies, it’s easy to start growing stevia plants indoors.
Containers{: target=“_blank” rel=“noopener”}: Depending upon your personal preference and style, you can opt for either clay or plastic pots to grow stevia plants. Ensure the container is sturdy and has drainage holes at the bottom to allow excess water to run out of the pot freely. A 12-inch pot is sufficient for growing a single plant.
Growing Media{: target=“_blank” rel=“noopener”}: Choose either a commercial potting mix or coconut coir{: target=“_blank” rel=“noopener”} to fill your containers. Both make excellent substrates as they are lightweight and have great water holding capacity. Potting soils contain no actual soil but are a mix of peat moss or coconut coir, pine bark, vermiculite, and perlite. Coconut coir is produced from the brown and white fibers found between the shell and the outer coating on a coconut seed.
Plants: Stevia can either be started from seeds or propagated through plant cuttings or layering. Some gardeners consider stevia seeds challenging to germinate and prefer to propagate new plants or buy starter plants from a local garden center.

The enthusiast's guide to herbs
We’re proud to present our new e-book, The Enthusiast’s Guide to Herbs! Learn everything you need to know about growing and caring for herbs indoors, including in-depth info cards for the 35 most commonly grown herbs.
Click the link below to find out more!
Instructions on starting plants
Stevia can be started from seed or propagated via stem cuttings or layering to create new plant clones. All methods are relatively simple, but in this case, it’s best to use propagation methods as seed germination rates are low and unreliable. If you start from seed, it’s recommended to use supplemental grow lights to give them adequate light.
Steps for propagating via stem cuttings
To start plants from stem cuttings:
- Cut a 4-inch piece of a stem off the plant, removing the leaves from the bottom 2-inches of the cutting.
- Dip the newly cut end of the stem in liquid or powdered rooting hormone.
- Carefully place the cutting in moist sand, perlite, or vermiculite.
- After 3 or 4 weeks, transplant the cutting to a container with potting soil.
Steps for air layering
If you have access to a mature stevia plant, you can propagate a new plantlet via air-layering{: target=“_blank” rel=“noopener”}:
- Gently bend a long stem or branch from a mature plant down towards the potting soil, taking care not to snap it off the plant.
- Secure the middle of the stem to the top of the growing media using pieces of wire or small metal stakes. Leave the top 3 to 4 inches free to continue growing.
- Once roots develop from the nodes touching the potting soil, carefully cut the stem from the main plant, transplanting it into a separate container.
Steps for starting from seed
Planting stevia from seeds is straightforward, following the basic planting methods.
- Moisten your chosen growing media so it is slightly damp, and use it to fill containers to about an inch below the top.
- Sow seeds about ¼” deep, gently covering them with the growing substrate.
- Set the container(s) where the ambient temperature is above 70℉.
- Keep the soil moist without letting it be waterlogged. Saturated soils are oxygen deficient because of an overabundance of water in the pore spaces.
- When seedlings reach 2 to 3-inches tall, thin them, keeping the best-looking plant for each container.
 {: width=“1440” height=“1000”}
Growing conditions needed
Native to Brazil and Paraguay, stevia plants only grow outdoors year-round in the warm climates of USDA hardiness zones 9 or warmer. They may overwinter in zone 8 if protected from the chilling damage of below-freezing temperatures and frost. Their preference for subtropical and tropical climates makes them an excellent choice for growing indoors in colder climates where the temperatures are much higher and carefully controlled.
Plus, growing stevia indoors in your herb garden allows you to lengthen the growing season and perpetually harvest leaves whenever you need them.
Sunlight Requirements
When grown outside, stevia plants thrive in full-sun locations where they receive a minimum of 6 to 8 hours of direct sunlight daily. When grown indoors as a houseplant, they need a minimum of 6 hours of daylight from a south or west-facing window but do better when they can bask in the sun for at least 8 to 10 hours.
South-facing windows typically have light streaming through them most of the day and provide the most sunlight in homes, making them the first choice for indoor plants. Westwardly-facing windows also stream sunlight for a long period during the day, but they often see afternoon shade when the sun is hot and the most intense. This makes them a great choice for plants prone to sun-scald.
If you aren’t blessed with a bright, sunlit home, it’s best to purchase a growing light for your indoor plants as they probably aren’t getting enough direct sunlight. This supplemental light keeps plants from growing tall and leggy and helps drive photosynthesis{: target=“_blank” rel=“noopener”} in the leaves – the process utilized by plants to convert carbon dioxide and water into sugar used for food.
Temperature Needs
With its native origins in South America, Stevia does best when indoor temperatures are above 70℉. Avoid letting the nighttime temperature drop below 50℉, and keep daytime temperatures from climbing over about 85℉. At both of these extremes, plant growth slows or may halt entirely due to internal stress occurring in the plant tissues.
Growing Tips
Overall, stevia is an easy-growing plant that doesn’t require a lot of attention beyond meeting its basic needs.
- Allow the top inch of growing media to dry out before watering. Stevia does not like the growing media to be soggy.
- Water the soil directly instead of watering plants from overhead. This prevents water from getting on the leaves.
- Maintain good air circulation through the middle of the plant to minimize pest and disease problems.
- Pinch off flower buds as they appear. If your plant blooms to display beautiful white flowers, remove them, and wait a few days to harvest leaves.
- Every 4 to 6 weeks, give plants a dilute dose of low nitrogen fertilizer. Too much nitrogen encourages leaves to grow large with little flavor.
- Harvest regularly, or pinch back the tips of the plant’s stems to encourage new growth and fuller, bushier plants.
- Use mature plants to propagate new plantlets every couple of years. A well-cared-for stevia plant will live 3 to 5 years, but the sweetness declines after the first growing season.
 {: width=“1440” height=“1000”}
How to harvest Stevia
Like other herbs, harvesting stevia leaves regularly is good for the overall health of the plant. Removing the tips of the stems encourages lateral growth, causing the plant to become bushier and fuller. Just make sure never to prune off more than one-third of the plant at one time.
- Harvest leaves early in the day for the best flavor.
- Using sharp, sterilized scissors or even your fingernails, remove stems right above the node where a pair of leaves grows. Don’t leave a chunk of stem on the plant.
- For the best flavor, harvest basil leaves before plants flower. If they do bloom, remove flowers and wait to harvest for a couple of days.
Once harvested, you can use the fresh leaves immediately or preserve them for future use. Stevia is best preserved by drying the leaves or creating a stevia extract. Store dried leaves in an airtight container.
- To dry leaves in a food dehydrator, lay leaves on dehydrator trays in a single layer. Dry them at the recommended temperature until the leaves are crispy.
- To air dry, create a bunch by tying a clump of 6-inch long stems together. Place the bunch inside a small paper bag with some holes in it, and hang the bag in a warm, dry, dark space.
Stevia extract is relatively easy to make and is really useful for adding to beverages.
- To create an extract, chop stevia leaves and place them in a clean jar.
- Cover the leaves with vodka, thread the lid on tightly, and shake the jar gently.
- Allow the leaves to steep for about 48 hours, and then strain the liquid into a small saucepan.
- Gently heat the liquid for 20-30 minutes, keeping it from boiling. This drives off the alcohol and thickens the extract slightly.
- Pour extract into a small bottle and store it in the fridge.
Stevia Facts
Indigenous people of South America have used stevia since before the 16th century. It’s steviol glycosides molecules within the leaves that provide the sweetness; these molecules are extracted and purified to create what is sold to consumers as stevia leaf extract.
- The leaves on a stevia plant can be 250-300 times sweeter than sugar.[1]
- Has a negligible effect on blood glucose, making it an excellent choice for diabetics.
- Doesn’t contribute carbohydrates or calories to your diet.
Some care needs to be taken when using it, though. Using too much stevia for sweetening results in a bitter, licorice-like aftertaste that comes from stevioside, another molecule found in the leaves.
Conclusion
Growing your own stevia is a fantastic way to have a natural, locally-sourced, minimally processed sweetener available anytime you need it. Like other herbs, stevia plants love the sun and warm temperatures and require very little fertilizer. Once mature, harvest leaves regularly to keep the plant bushy and full.

Join our email club—get printable info cards free!
Sign up to receive our newsletter and get access to 10 printable plant info cards from our e-book for free. Also receive:
- $4 discount code for our Guide to Herbs e-book
- Semi-weekly plant inspiration & bite-size tips and tricks
