How to grow chervil (beginner-friendly guide)
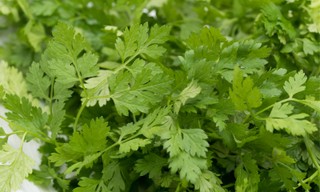
Chervil is a biennial herb that thrives in cool areas. A staple of French cooking, it has a mild licorice flavor. This beginner-friendly guide will teach you how to grow it at home.
Chervil can be grown from seeds in the ground, in a container, or as a microgreen. Because it’s sensitive to bolting in hot temperatures, chervil should be grown in moist soil in partial shade.
Also known as French parsley because of how common it is in French cooking, chervil makes for an ideal beginner’s herb: it is fast-growing, relatively hardy, and doesn’t require much fuss. If you live in USDA Hardiness Zones 3–7, you can easily grow and harvest chervil year-round. If you live in Zones 8 and above, you can grow it in spring, fall, and winter (it will bolt in the summer heat).
Chervil is a biennial herb, which means it has a lifespan of two years. Leaves are more flavorful in the first year, and gradually lose flavor over time. Whether you’re growing it indoors or outdoors, you can expect to start harvesting your chervil 30–60 days after it starts to sprout, or once your plants reach at least 6 inches (15 cm) in height. If you plan to use chervil frequently, sow seeds every 3–4 weeks to secure a constant supply of fresh leaves.
Chervil is relatively hardy, but will bolt (begin to flower and lose its flavor) when temperatures get too high. If you live on any of the coasts or in the South, we recommend keeping it inside where it’s protected from the summer heat.
Growing chervil from seeds in the ground
Chervil seeds germinate in soil between 60–65°F (15–18°C). It is best to plant them in early spring, but chervil can be grown year-round in most climates. Sow seeds 9–12 inches (23–30 cm) apart, and ¼–½ inches (5–10 mm) deep.
Make sure you pick an area that is protected from the midday sun—chervil thrives in cool areas with moist, loamy soil. If your soil isn’t naturally nutrient-rich, fertilize it before planting. A single application of slow-release fertilizer is normally sufficient.
It is important to keep your soil moist, but avoid overwatering. You can tell when it’s time to water your chervil by sticking a finger in the soil. If the top ½ inch (10 mm) of the soil is dry, it’s time to water.
Growing chervil from seeds indoors
Chervil makes for a great windowsill herb, but there are a few things to take into consideration if you plan to grow it indoors.
Picking an appropriate container
Chervil plants grow long taproots (similar to that of a carrot) to anchor themselves in the soil, so it’s best to pick a deep container. To make sure your plants have enough room to thrive, make sure your container is at least 10 inches (25 cm) deep and 8 inches (20 cm) wide.
You should also make sure the container has adequate drainage holes. Any material will work, but we recommend using a ceramic container as it will hold the moisture better than a more porous material like terracotta or clay.
This is our favorite deep, ceramic container:
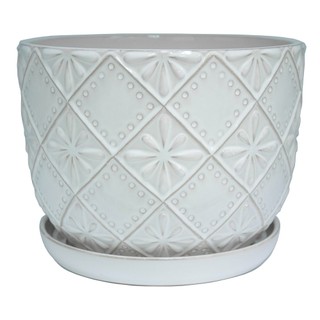
12×12-in cream ceramic planter
- Ceramic clay with glaze finish
- Drainage holes & attached saucer
- 10 inches deep, 10 inches in diameter
- Ideal for indoor use
Avoid moving your chervil plants from one container to another, since its delicate taproot responds poorly to disturbance.
Picking the right soil
Because chervil prefers to grow in moist soil, it’s important to pick a mix with high water retention.
We recommend going with a commercial potting soil specifically formulated for moisture-loving plants. If you can’t find one, you can always mix extra coconut coir or peat moss into a normal potting soil to increase water retention.
If you’re in the U.S., we recommend that you use this soil, which is organic and retains water really well:
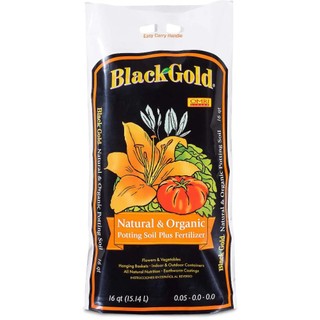
16-quart organic potting soil mix
- Provides retention advantage against sun exposure
- Contains organic grade fertilizer
- Contains enough soil for 1 cubic feet of space
Instructions
- Fill your containers with pre-moistened soil
- Place seeds on top of the soil, 3–4 inches (8–10 cm) apart
- Cover the seeds with about ¼–½ inches (5–10 mm) of soil
- Your seeds will start to sprout after 7–14 days, as long as you keep the soil moist (but not soggy)
- When your plants are about 3 inches (8 cm) tall, thin them out to one plant per 8-inch (20 cm) container or three plants per 12-inch (30 cm) container
Growing chervil as a microgreen
You can also grow chervil as a microgreen. In this article we’ll just cover the easiest method you can use, but we go into greater depth about microgreen gardening in our Microgreens 101 article.
You will need a growing tray, coconut coir, and a spray bottle.
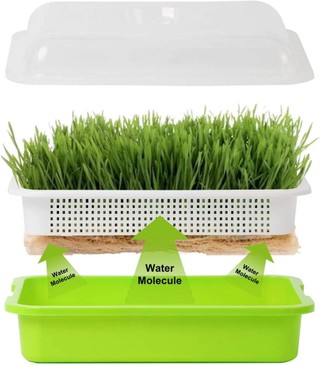
2× BPA-free nursery trays with covers
- Deeper than normal trays, perfect for herbs with deep roots
- Water using spray bottle or fill bottom tray with water
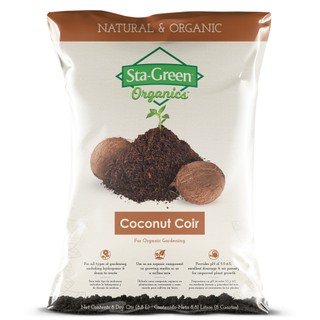
8-quart organic coconut coir
- For all types of gardening including hydroponic and drain-to-waste
- Use as an organic component in growing media or as a soil-less mix
- Provides a pH of 5.5–6.5

16-oz glass bottles with plastic spray triggers
- BPA-free, dishwasher-safe
- Chalkboard labels
- Squeeze-handle pump can be set to stream or spray settings
Instructions
- Fill your tray with about one inch (2.5 cm) of moistened coconut coir
- Spread seeds evenly over the entire surface
- Sprinkle a little bit of coconut coir over them
- Gently press the seeds into the coconut coir to help them make contact with the growing medium
- Cover the tray with the moisture dome (or use cling wrap—just make sure to poke a few holes in it)
- Keep moist—if your tray is in a windowsill, you will likely need to mist the seeds at least once a day
When your seeds sprout, you can remove the moisture dome and place the tray in a location where it receives 3–4 hours of sunlight per day. Once your chervil microgreens are ready to harvest, use sharp scissors to cut plants down just above the soil line.
How to keep your chervil healthy
Once your chervil plants have established themselves, there are only a few things you need to keep in mind to make sure they stay healthy.
- Protect your chervil from the midday sun. It will bolt if exposed to too much heat.
- Keep the soil moist, but not saturated. Drought can easily turn the leaves bitter or even kill the plant.
- Remove flower buds as they form. This will extend its lifespan: once the plant flowers it loses its flavor and should be discarded.
- Avoid overfertilization. You may spray plants with liquid seaweed after they leaf, but avoid overfeeding as it will result in larger but flavorless leaves.
Popular varieties
Aside from the plain chervil with its characteristic flat leaves, there are three common varieties or cultivars that you may be interested in:
- Crispum. Curled green leaves with a milder flavor profile than plain chervil. Very pretty, but not as useful in the kitchen.
- Vertissimo, also known as Brussels Winter. Flat and lacy dark green leaves that withstand winter temperatures better than plain chervil. Slower to bolt. Can be planted in fall for spring harvest.
FAQ
Is chervil easy to grow?
Yes, chervil is easy to grow. It is a hardy herb with few naturally occurring problems.
Can chervil be grown in pots?
Yes, chervil can be grown in pots. It thrives in moist soil and establishes deep roots similar to a carrot, so we recommend using a non-porous ceramic pot that is at least 10 inches (25 cm) deep.
Is chervil annual or perennial?
Neither. Chervil is biennial, which means it has a biological lifespan of two years. Leaves gradually lose flavor after one year.
What is the best way to grow chervil?
Chervil can be grown outdoors, indoors in a pot, or indoors as a microgreen. We recommend growing it indoors in a large pot, as excessive heat and sunlight will cause plants to bolt.
How long does chervil take to grow?
In typical conditions, you can expect your chervil to germinate in 10–14 days, reach maturity in 42–56 days, and be ready for harvest in 42–70 days.
How big is chervil?
Plain chervil and crispum chervil typically grow to be around 1–2 feet (30–60 cm) high, whereas the vertissimo variety usually reaches 2 feet (60 cm). Individual plants typically reach a width of 6–12 inches (15–30 cm).
Is chervil a hardy herb?
Yes, chervil is hardy and thrives in USDA Plant Hardiness Zones 3–7. The vertissimo variety, also known as Brussels Winter, is even more vigorous and better equipped to withstand winter temperatures.
Chervil vs. parsley
Chervil is related to parsley, but has a mild licorice flavor whereas parsley is more peppery. Parsley prefers sunny areas, but both can be grown inside on your windowsill or as microgreens.
Both parsley and chervil, along with tarragon and chives, are used as fines herbes in French cooking—meaning they are added as last-minute seasoning to poultry, fish, and eggs.
Want to grow all four fines herbes? Check out our other beginner-friendly guides:
